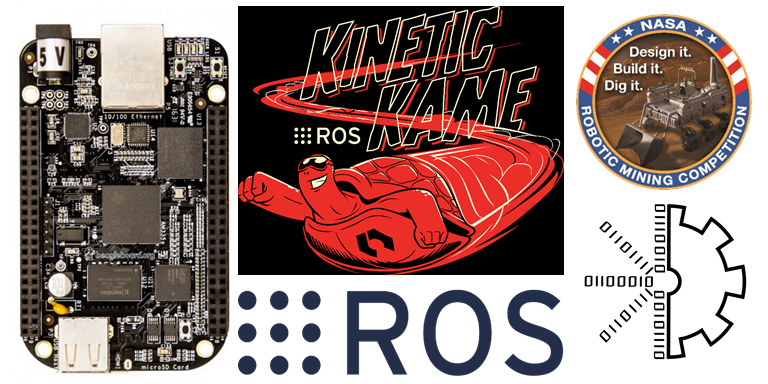
Our hardware team's work with running ROS on the beaglebone black
This post is intended to be a tutorial on setting up and running ROS on the Beaglebone Black. It assumes some basic knowledge of linux.
The Hardware
Why Beaglebone Black and not Blue? Why not a Raspberry Pi?
The bealgebone blue is nice, but it's features don't make a lot of sense for our use case. We need hardware that's more specialized for our application. We designed a board that neatly integrates digital I/O, an analog front-end, and a few odd sensors, as well as providing all power rails from a 12V input.
Compared to a raspberry pi, beaglebones have more GPIO, plus both their hardware and software is completely open-source, which we like.
Operating System and Initial Setup
In this tutorial we'll be using Debian Buster. For the beaglebone, we'll use a a lightweight (IOT) OS that most notably omits graphics, which you can find here. We also chose to flash the OS to the onboard eMMC. See this guide on how to do this.
It's nice to make a new user that will do all the ros things (instead of using the default user). We'll call this user ros with password cwrubotix. You may need to log out and back in for the changes to take.
~ $ sudo adduser ros
~ $ sudo usermod -aG sudo ros
Next, we wish to create our ros workspace on the external micro SD card so that we don't take up the limited onboard eMMC storage. We want the OS to mount the SD card on boot to a specified path (in our case, /home/ros). First you'll want to format and partition the SD card. I recommend ext4 formatting and unless you have special requirements, just go ahead and make the whole thing one partition. The SD card should show up as /dev/mmcblk0p1. Assuming this, add the following line to the /etc/fstab file.
/dev/mmcblk0p1 /home/ros ext4 nofail,rw 0 2
Setting up ROS on the BBB
The process we used for setting up ROS on our Beaglebone was based on this post by Machine Koder Consulting - much thanks to them. We need to make a few modifications however.
Setup ROS repositories
Our first modification is made to the "Setup ROS repositories" step. Because we're using Debian Buster, we need to execute the following (note the change from "stretch" to "buster"):
~ $ sudo sh -c 'echo "deb http://packages.ros.org/ros/ubuntu buster main" > /etc/apt/sources.list.d/ros-latest.list'
~ $ wget https://raw.githubusercontent.com/ros/rosdistro/master/ros.key -O - | sudo apt-key add -
~ $ sudo apt-get update
~ $ sudo apt-get upgrade
Preparing the ROS build
Next modification is made to the "Preparing the ROS build" step, where they say to execute this line:
~ $ rosinstall_generator ros_comm --rosdistro kinetic --deps --wet-only --exclude roslisp --tar > kinetic-ros_comm-wet.rosinstall
We need to add common_msgs after ros_comm so that you have the following:
~ $ rosinstall_generator ros_comm common_msgs --rosdistro kinetic --deps --wet-only --exclude roslisp --tar > kinetic-ros_comm-wet.rosinstall
Install ROS dependencies
In this section, we need execute the following line instead to install dependencies for debian buster:
~ $ rosdep install --from-paths src --ignore-src --rosdistro kinetic -y -r --os=debian:buster
Build ROS
Now, before you run the command in the "Build ROS" section, we need to apply a patch to rospack. In short, this is because we are installing on a non-supported operating system. A kind github user, jveitchmichaelis, has provided a patch for us to use. So we're going to remove the existing rospack, and clone jveitchmichaelis's rospack:
~ $ rm -R ~/ros_catkin_ws/src/rospack
~ $ cd ~/ros_catkin_ws/src
~ $ git clone https://github.com/jveitchmichaelis/rospack.git
We also need to install another package before building ROS. Execute the following:
~ $ sudo apt-get install libtinyxml2-dev
Now proceed with the "Build ROS" section, noting that it will take a few hours on a beaglebone.
Enabling CAN and SPIDEV
With our hardware, we rely heavily on CAN bus and SPI bus. Fortunately the beaglebone has CAN and SPI controllers built in. The two steps to using them are first: enabling the device tree overlays, and second: configuring the GPIO pins.
Add the following lines to /boot/uEnv.txt. Doing this will enable and disable the correct uboot overlays at boot time.
capemgr.enable_partno=BB-CAN1
capemgr.disable_partno=BB-BONELT-HDMI,BB-BONELT-HDMIN
capemgr.enable_partno=BB-SPI1-01
After this, we still need to configure the GPIO pins, and we'd like it to happen on startup. I've found the easiest way to do this is a configuration script that will be started by systemd at boot time. First, we create the script:~ $ sudo vim /usr/bin/config_pins.sh and enter the following lines.
#!/bin/bash
config-pin p9.24 can
config-pin p9.26 can
config-pin p9.29 spi
config-pin p9.30 spi
config-pin p9.31 spi_sclk
Next make the script executable with: ~ $ sudo chmod a+x /usr/bin/config_pins.sh.
Now we need to setup the service configuration file: ~ $ sudo vim /lib/systemd/system/config_pins.service and enter:
[Unit]
Description=Enable pin configuration at startup
After=generic-board-startup.service
[Service]
Type=simple
ExecStart=/usr/bin/config_pins.sh
[Install]
WantedBy=multi-user.target
Now we need to activate the new service.
~ $ sudo systemctl daemon-reload
~ $ sudo systemctl enable config_pins.service
~ $ sudo reboot
ROS Setup Scripts
When the launch file goes to start ROS nodes on the beaglebone, is will use SSH. So that means our .bashrc file will get run. It's useful to add a few things to this file.
source /home/ros/ros_catkin_ws/devel/setup.bash
source /home/ros/ros_setup.sh
/home/ros/ros_setup.sh doesn't exist yet, so lets create that and enter the following:
#!/bin/bash
export ROS_MASTER_URI=http://192.168.7.1:11311
export ROS_IP=192.168.7.2
export ROS_LANG_DISABLE=genlisp:geneus:gennodejs