Altium Designer Helps Case Western Reserve University Students Design Autonomous Mining Robot
The student-run robotics club at Case Western Reserve University (CWRUbotix) is a venue for students to apply what they learn in class to real world design problems. Every year we participate in a variety of competitions ranging from 6 pound combat bots to autonomous, 80-kilogram Martian excavating rovers.
Electronics Design for Students
In an effort to provide greater challenges (and tangible design experience) for our electrical engineering students in the club, we decided to pursue custom electronics for our NASA Robotic Mining Competition robot (more about this competition can be found here) and for our MATE ROV underwater robot. The goal of the NASA RMC is to design and build a large regolith and ice excavating rover that will inspire NASA’s designs for future robots destined for the moon and Mars. The MATE ROV challenge is to design and build a robot to perform a variety of underwater tasks. Each challenge presented unique challenges and custom electronics allowed us to build hardware that precisely suited our space and performance requirements for these complex tasks.
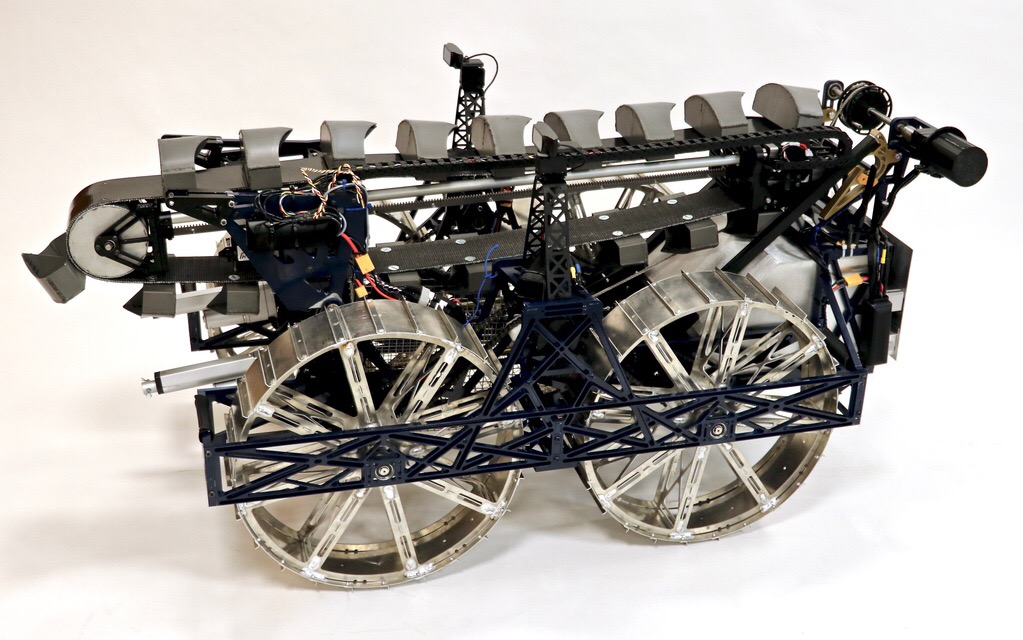
Our robot for the 2019 NASA Robotic Mining Challenge.
Choosing an ECAD Solution
The 2018-2019 competition season marked our second year using Altium Designer. As a student-run club often strapped for money, we would generally look around for free and/or community-run software that meets our needs. However, we want to provide our electrical engineers with design experiences similar to those they would find in industry, and the aforementioned software packages simply do not compare to industry-standard EDA tools. In addition, many of our students had never used a schematic capture or PCB design tool. This meant that the software needed to be easy to learn and manage. Altium Designer was clearly the ECAD choice for us.
Our Experience
Since many of our members are new to electronics design, we needed a design environment that was both easily accessible to young engineers and flexible enough to support the needs of many simultaneous projects. Through trial and error, we settled on having a central library stored on a campus server which each student could download and reference. Altium’s Database Libraries with integration in Microsoft Excel allowed students to easily install the entire central library at once and allowed us to create components easily and quickly. Using this type of database system, students would not be burdened by spotty Wi-Fi and could even work on projects while off campus or offline.
With the central library set up, the next step was to teach students how to use Altium Designer. The wealth of Altium documentation online made this much easier than we expected. Students would learn the basics of the software in workshop-like settings and then could find information regarding useful features and shortcuts as well as detailed documentation on the more complicated aspects of the software online. A combination of student intuition and these resources meant that students were ready to start designs after only a couple of weeks.
In the 2018-2019 year we designed and built several custom components across our design teams. These included a pH sensor interface board and high-current buck converter for our MATE ROV robot. For our NASA RMC robot, these included a hardware-controller board, soft-start module, fuse panel, and Ultra-Wideband Real Time Localization Modules.
NASA RMC
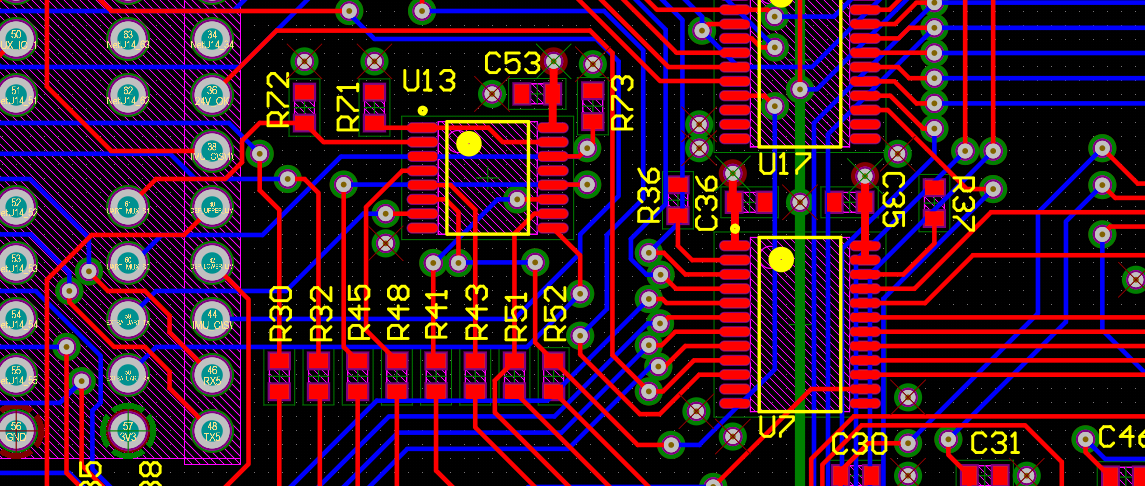
The main deliverable from the hardware team was the hardware controller board. It handled low level control and sensor data acquisition, effectively providing an interface between the central computer hosting the software subsystem and all sensors, motors, and actuators on the robot.
For this task, the 3D modeling tools in Altium were invaluable. The hardware team was able to provide the mechanical team with a precise CAD model of the final board making its integration into the system seamless. 3D visualization also gives students a glimpse into what their assembled board will look like, allowing them to check height clearances, make sure it is easy to assemble, and confirm sizing and space allocation with the mechanical team.
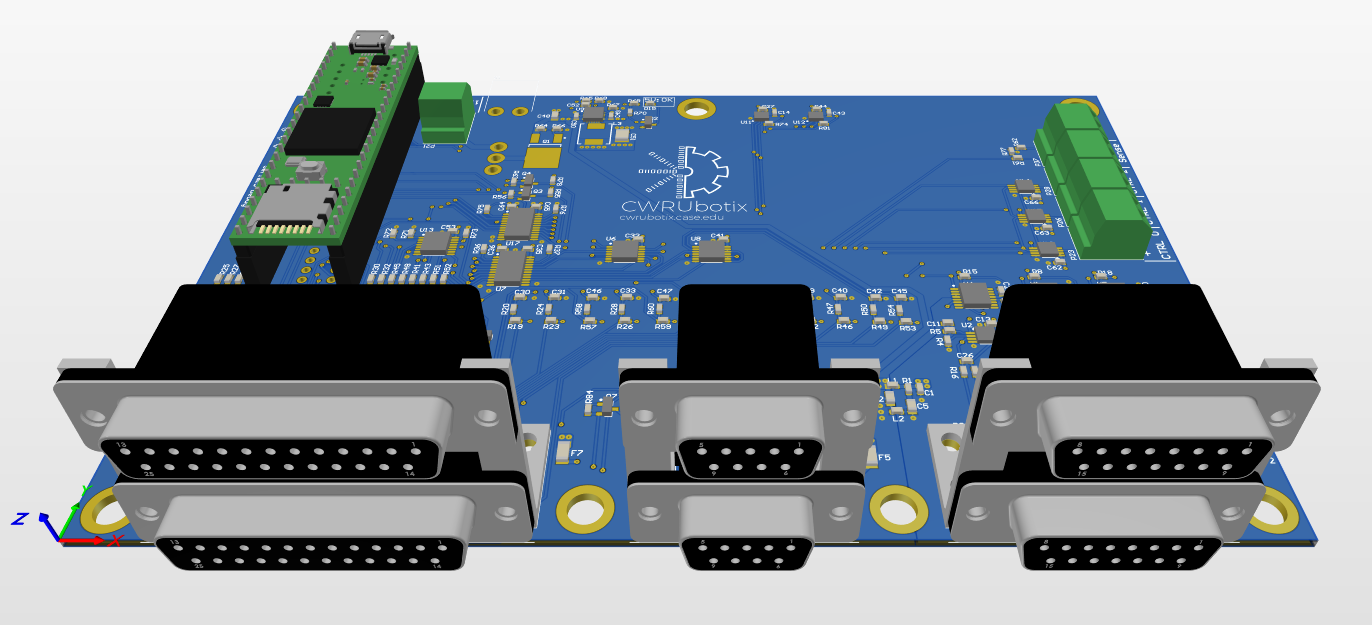
3D view of our hardware controller board for our NASA RMC robot.
Another custom design worthy of note was a hardware-based solution for robot localization, a critical function for autonomy. The team decided to design a Real Time Localization System (RTLS) using Ultra-Wideband (UWB) transceivers controlled over CANbus. The device is based on an STM32F1 microcontroller and the Decawave DWM1000 UWB transceiver module. The resulting design was a success. It can achieve 10cm accuracy and will be used by the team in the 2019-2020 system for robot localization.
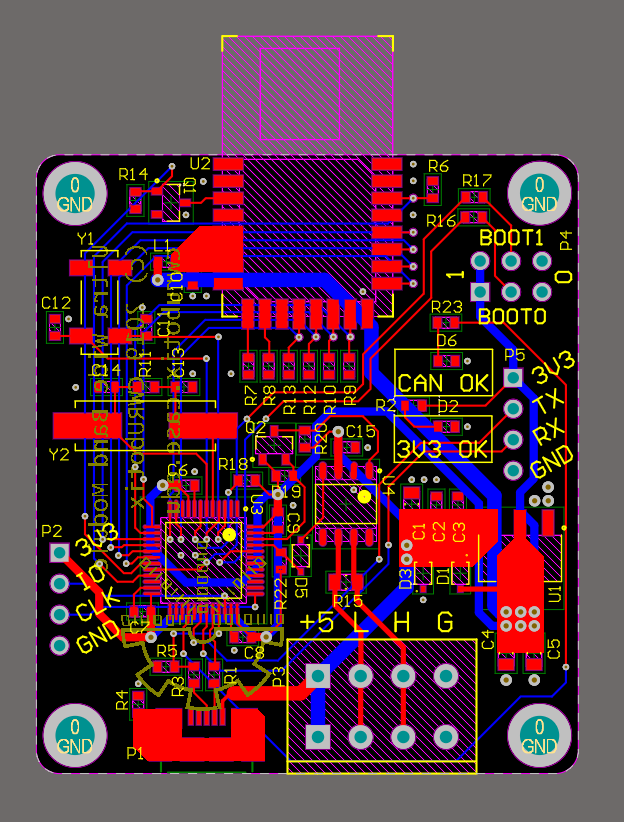
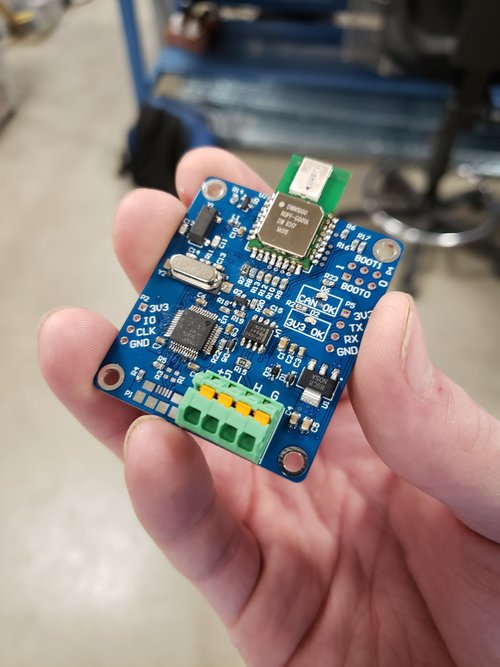
Layout of our UWB localization module (left) and the assembled board (right).
MATE ROV
The 2018-19 season was the first year for the team’s participation in the MATE ROV challenge. The MATE ROV team had to solve many challenges; the two they elected to solve with custom hardware were a pH sensor interface and a high-current buck converter. The decision to design these resulted from a lack of adequate hardware available on the market. These devices involved sensitive analog and careful power design practices, both on the schematic level and PCB layout level. Additionally, the team was working with very limited space for onboard electronics, making the 3D modeling tools once again invaluable.
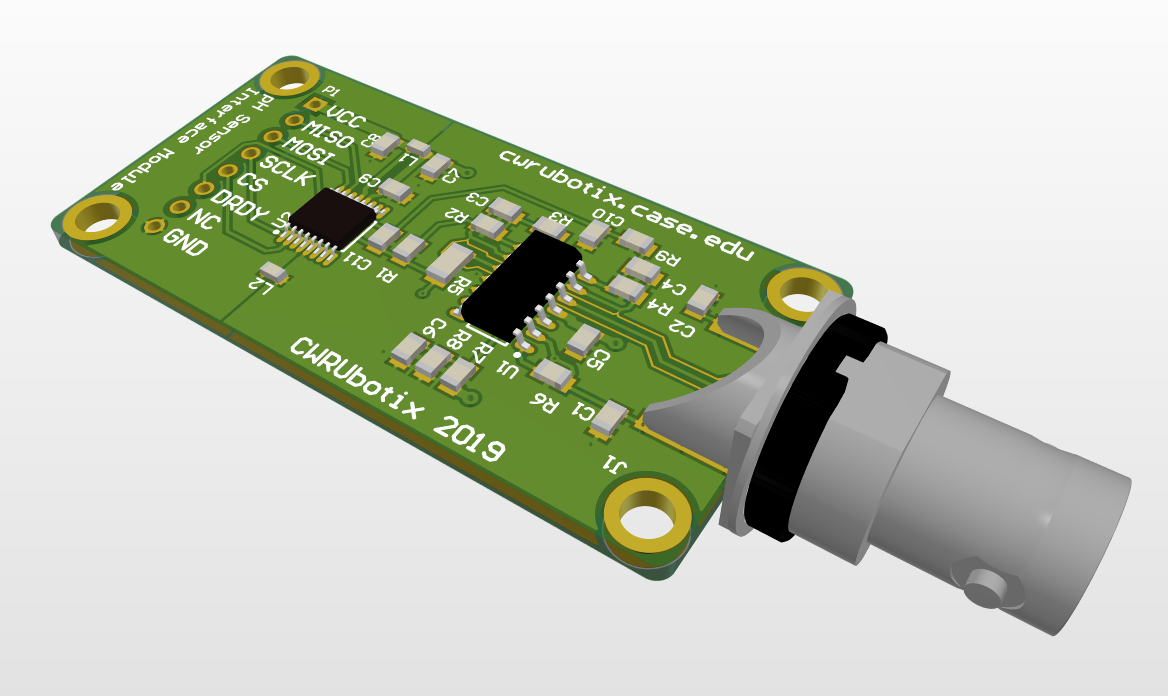
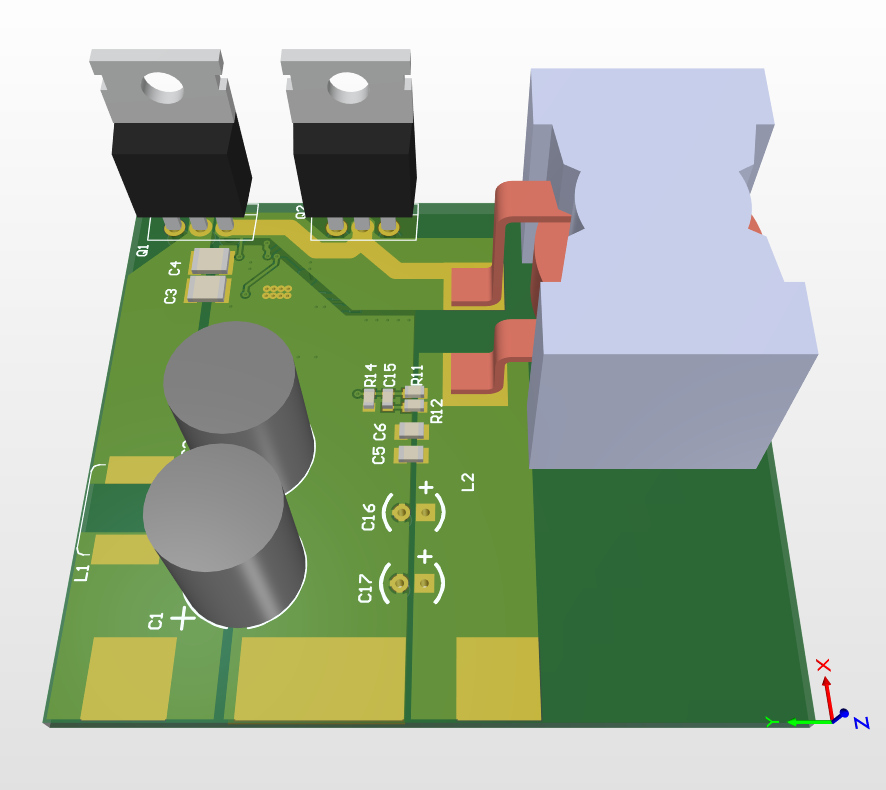
3D views of our pH sensor interface board (left) and our high-current buck converter (right).
Small Batch Proto-typing
When building up a small number of units (<10), several tools are especially useful. Two of the most important documents to have are a detailed BOM and an assembly drawing. The BOM tells you, among other things, which components map to which reference designators and the assembly drawing tells you which pads on the PCB correspond to which reference designator. With Altium Designer, students didn’t have to fuss around with creating BOM’s or assembly drawings by hand. Both can be generated with a few clicks of the mouse and are highly customizable, making documentation painless and assembly smooth.
Thoughts Going Forward
Now that our second year using Altium Designer is done, we plan to continue with another round of custom electronics solutions. Now that we have a larger, more experienced population of Altium users, we will be in a much better position to teach our newer members the awesomeness of circuit and PCB design. On the to-do list for next year are a power management board, isolated power supplies, co-processor modules, and more. Many thanks to Altium for sponsoring our team. We look forward to another year of electronics design!